Description
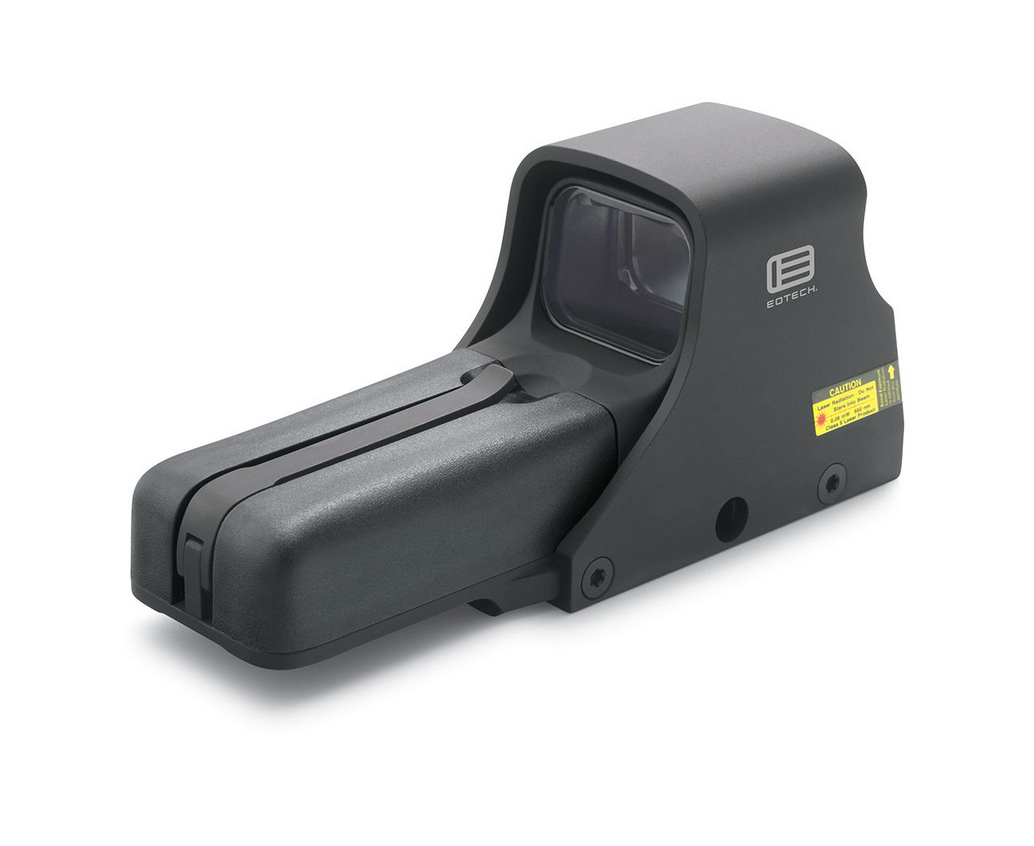
The HWS 512 is perfect for anyone who wants fast target acquisition, reliability, durability, and the anyplace availability of AA batteries without the need for night-vision compatibility. The 512 is the most popular HWS in the lineup.
The L-3 EOTech HOLOgraphic Weapon Sight (HWS) is a revolutionary sighting system based on advanced holographic technology. The HWS enhances target acquisition, improves accuracy, and provides more control over your shooting environment. The HWS fills the needs of all shooters from the novice to the most advanced professional. EOTech’s objective is to give each and every customer the quality, commitment, and service expected from the sighting industry leader.
We are required to adhere to a Minimum Advertised Price (MAP) by the manufacturer, and anyone not listing this minimum price is breaking the rules or selling counterfeit, so if you find a better price advertised anywhere, please let us know and we will try to meet or beat that price!
Made in USA
Night Vision Compatibility: No
If you want Night Vision Compatibility, look at the 552.A65. Same great sight and features plus Night Vision Compatibility.
Includes:
- HWS 512
- Quick-Start Guide
- Warranty Card
- 2x AA Alkaline Batteries
- Protective Case
Specifications:
- Button Position: Back of Optic
- L x W x H: 5.6″ x 2.2″ x 2.9″ (142.2 x 55.9 x 73.7 mm)
- Weight: 13.8 oz (391.2 g)
- Water Resistant: 33ft. (10 m) depth
- Mount: 1″ Weaver or MIL-STD-1913 rail
- Windage & Elevation Adjustment: 0.5 MOA per click
- Button Location: Side
- Brightness: 20 daylight settings & 10 additional settings for Gen I through III
- Power Source: 2 x 1.5 V AA batteries – Supports lithium, alkaline or rechargeable
- Operating Temperature: -40°F to 140°F (-40°C to 60°C)
- Battery Life:
-Lithium: 2,500 continuous hours at nominal setting 12 at room temperature
-Alkaline: 2,200 continuous hours at nominal setting 12 at room temperature
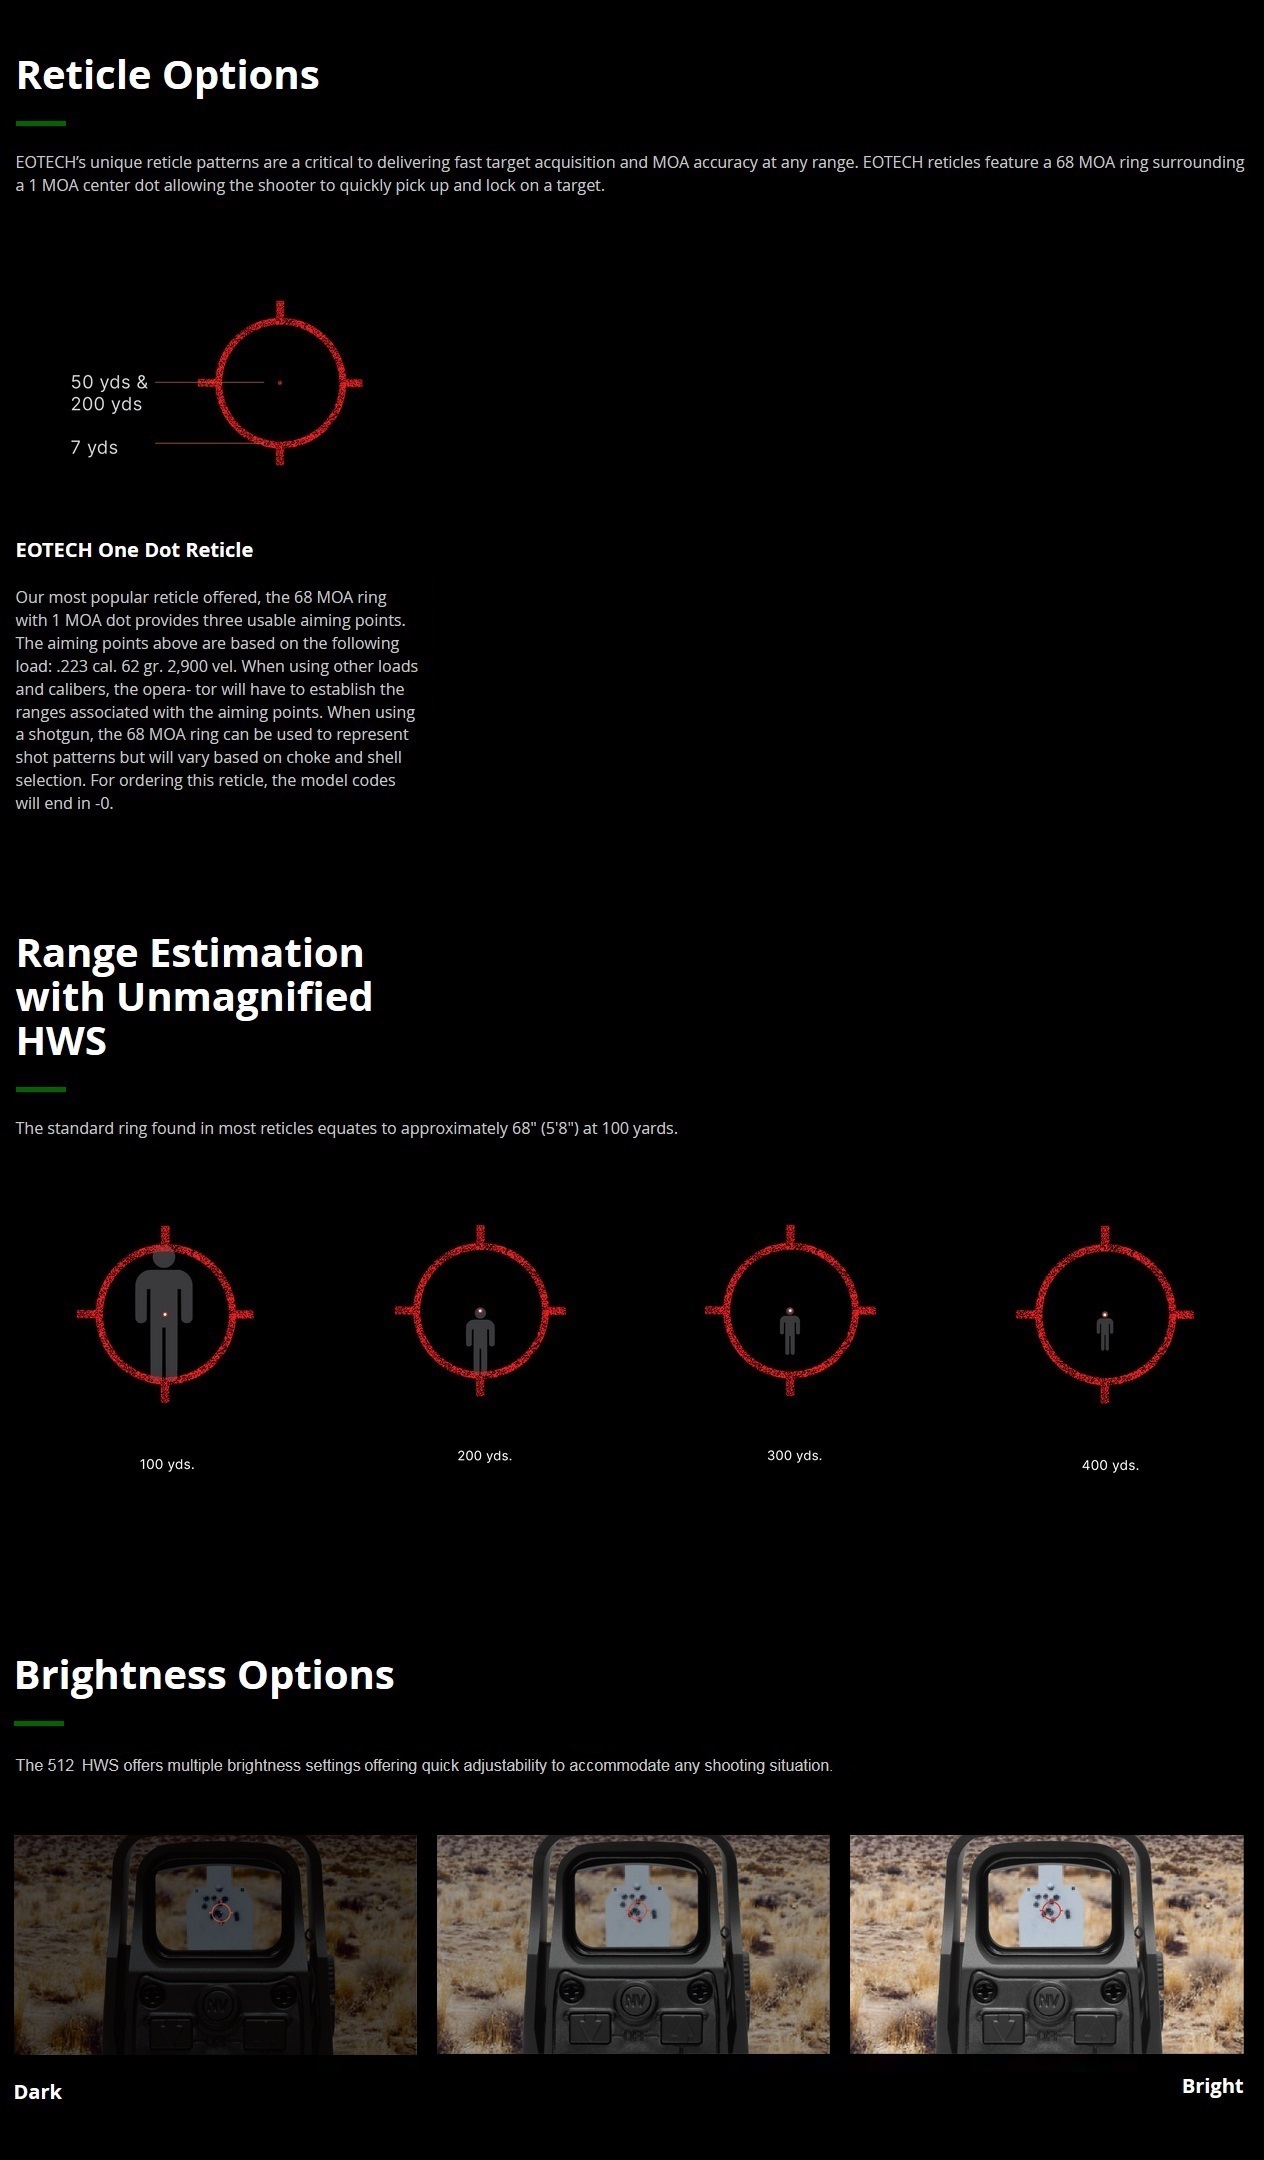
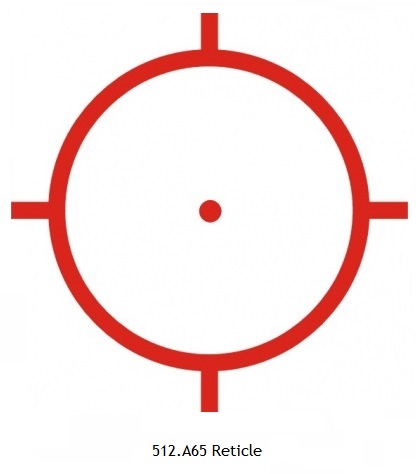
• 0 – 68 minute ring with vertical and horizontal stadia and a 1 MOA aiming dot.

• Optics: Transmission holography
• Optical Surfaces: Anti-Reflection coating on external surfaces
• Power Source: 2 x Alkaline or Lithium batteries
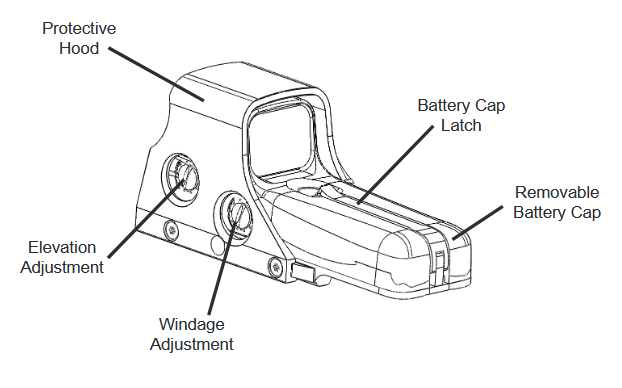
Protective Hood– Preassembled, protective hood increases durability of sight housing and protects the sight from impact damage.
Battery Latch – A cam lever that secures the removable battery compartment to the sight and prevents water, dirt, or grime from entering the battery housing.
Battery Cap – Protective housing that contains the power source for the HWS. The compartment is easily and quickly removed for the replacement of batteries.
Universal Mount– Integrated base to mount to either a 1” (25.4mm) Weaver or MIL-STD-1913
rail.
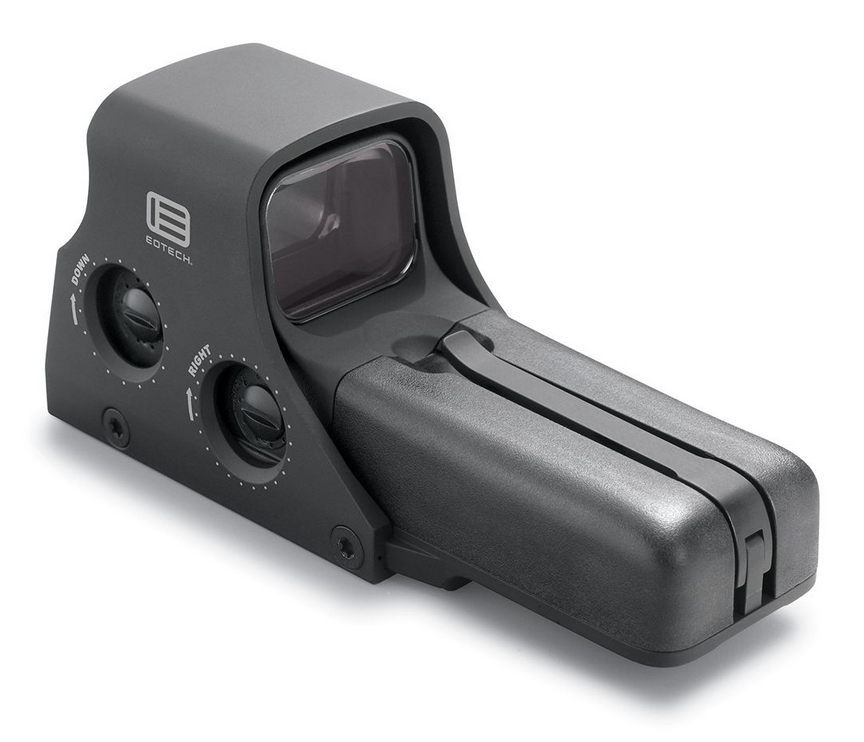
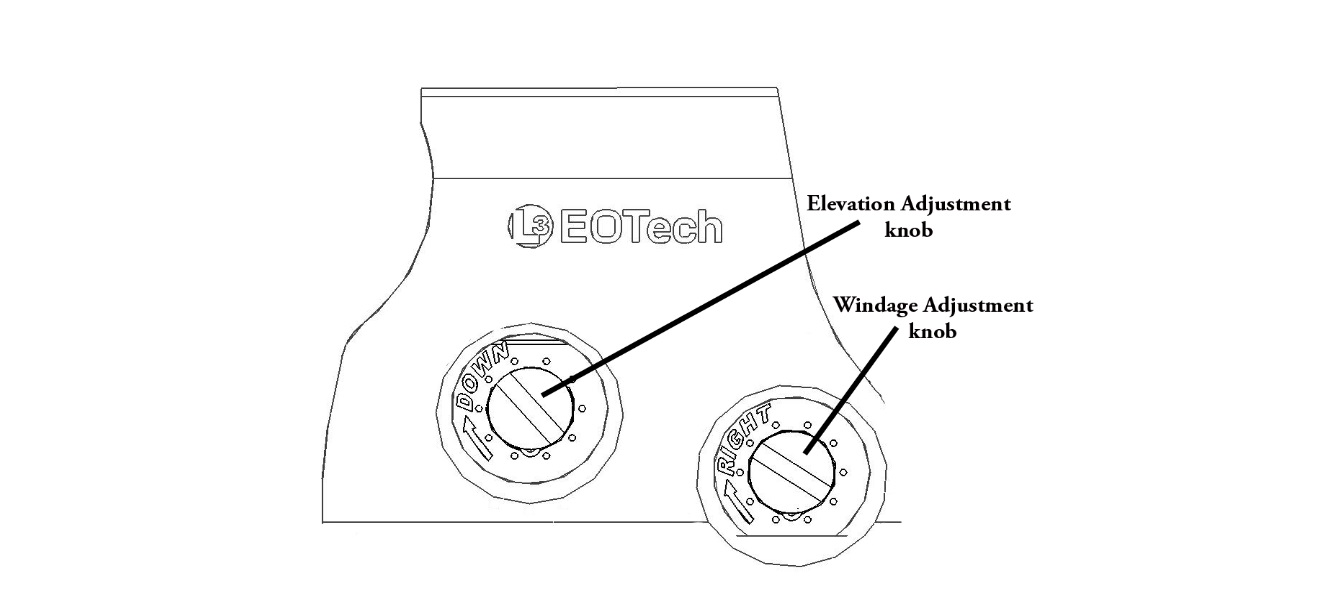
Windage Adjustment– Adjusts the point of aim at 100 yards approx. 1/2 inch per click in a leftward and rightward direction when zeroing.
Elevation Adjustment – Adjusts the point of aim at 100 yards approx. 1/2 inch per click in an upward and downward direction when zeroing.
On/Off, NV Mode, and Brightness Switches– Raised button control interface allows the operator to perform and adjust user settings for appropriate and preferred conditions
This section describes the features and operating instructions of the 512. Please read the instructions carefully before mounting and using the sight, and always practice proper firearm safety.
• Sight assembly
The HWS uses a laser to illuminate a holographic reticle pattern embedded in the display window and forms a virtual image of a reticle pattern. The shooter looks through the display window and sees a bright red image of a reticle pattern projected onto the target plane. No light is projected onto the target plane. The HWS has no magnification.
The HWS is equipped with a protective hood. This hood is pre-assembled at the factory. Should your hood require repair or replacement, please contact your unit armorer for repair, replacement, or contact the manufacturer (L-3 EOTech) for repair or replacement.
Two initially supplied (2) AA alkaline batteries power the 512 HWS. The HWS is designed to maintain constant brightness at a particular setting as the batteries drain down. The reticle brightness will not fade gradually as the batteries run down, but rather, shut down abruptly. The first indication of the batteries draining is the reticle blinking when the unit is turned on. Another indication of low batteries is the reticle pattern blinking off and on during recoil. With high recoil guns, this can occur before the battery check indicates low battery condition. If the reticle pattern blinks off and on during recoil or turns off suddenly, replace the batteries. Please read and follow the battery replacement and battery check procedures described in this Manual. It is always good practice to replace the batteries with a fresh one before a mission.
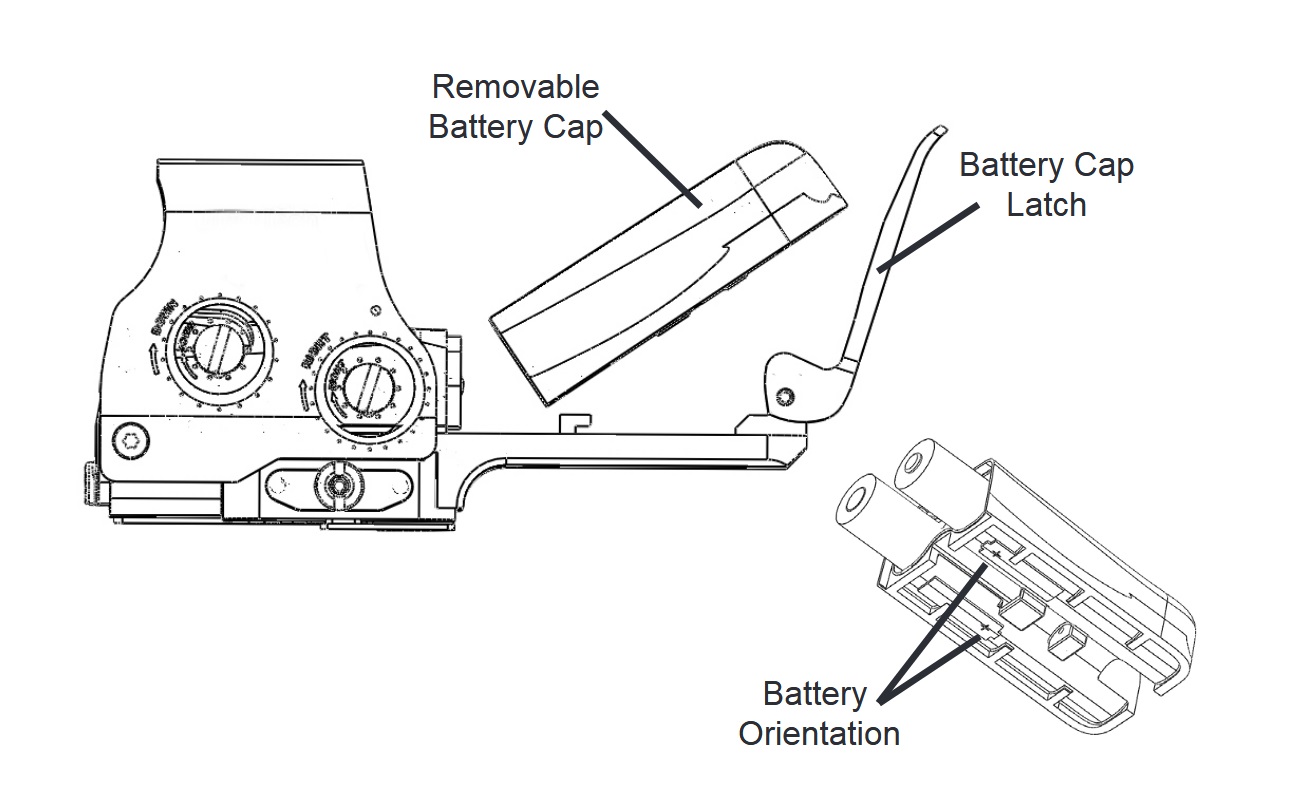
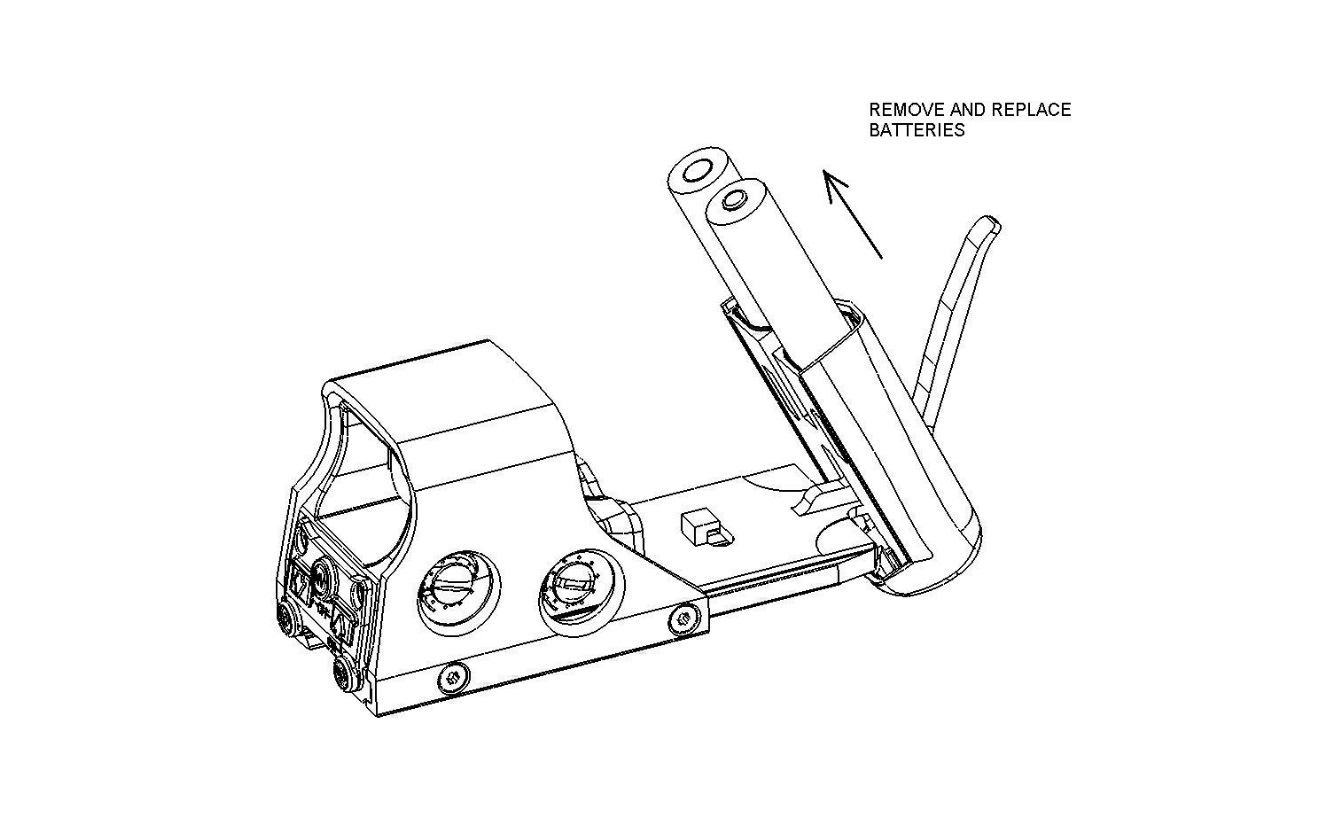
Remove the battery compartment by lifting up on the locking cam lever and carefully sliding the battery compartment away and up from the sight housing. After the battery compartment is removed, slide the batteries out and replace them with a fresh set. The labels on the bottom of battery compartment show the correct battery orientation. Always make sure the gasket is free of dirt before the battery compartment is reinstalled or the seal may be compromised. To reinstall the battery compartment, point the sight towards the ground and slide battery compartment onto base. Make sure there is enough clearance between the contact and the batteries to avoid bending the contacts. Hold the battery compartment down firmly against the base and close the locking cam.Before you push down on cam lever, make sure the battery compartment sits all the way down and is parallel to the base. Verify correct battery installation immediately by turning on the sight and checking if the holographic reticle appears. If the batteries are left in the sight backwards, they will be drained of their power.
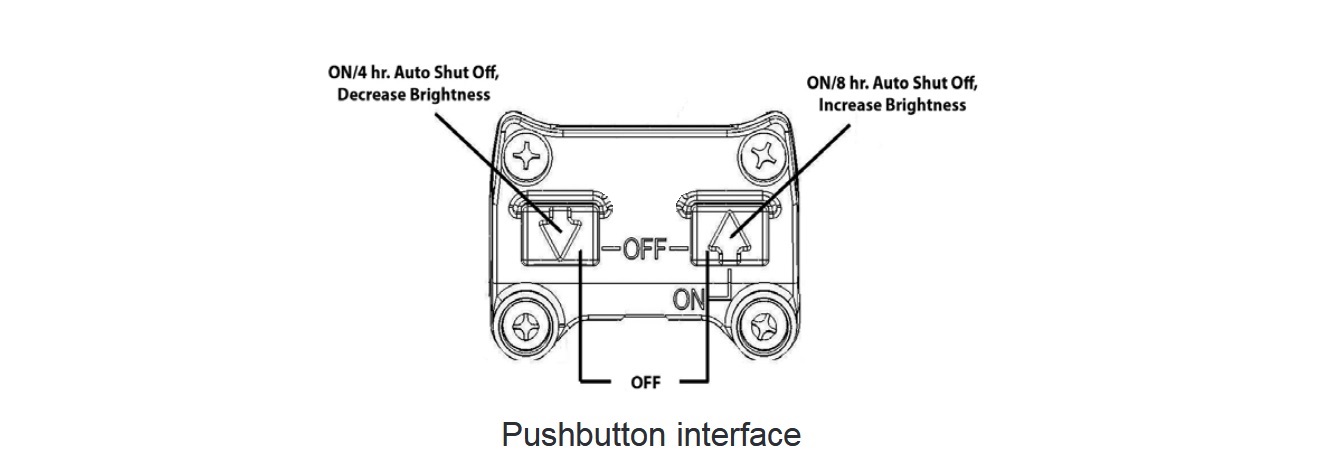
All electronic controls are via pushbutton switches located at the rear of the unit housing. To ensure proper operation of the pushbutton switches, press firmly on the center of the switch.
Pressing the Up or Down Arrow pushbutton switches will turn the sight ON at Level 12. See item 4 under this section for a description of Auto shutdown. The sight will automatically perform a battery check every time it is turned on. The reticle will blink when the batteries have between 20 percent or less useful life left.
2. OFF:
To turn the sight off, simultaneously press both the UP and DOWN arrows. Verify that the sight is on/off by looking through the heads-up display window for the reticle.
3. Brightness Adjustment:
Pushbutton switches vary the brightness intensity of the holographic reticle pattern. Pressing the UP arrow or DOWN arrow switch will change the brightness level up or down. There are twenty (20) daytime brightness settings provided to allow the user to adjust the reticle brightness to their preference.
4. Auto Shutdown:
The HWS has an auto shutdown feature. If the sight is turned on by pressing the UP button, it will automatically shut itself OFF 8 hours after the last pushbutton control is used. The sight will automatically shut OFF after 4 hours if it is turned on by pressing the DOWN button.
CAUTION – When encountering an increase in resistance in adjustments, the end of the adjustment range has been reached. DO NOT turn the adjustments any farther, serious damage may occur to the sight.
OPERATOR LEVEL MAINTENANCE
The operator is limited to replacing batteries and cleaning the battery compartment and outer housing surfaces of the sight.
in any camera store. Never clean the glass surface with a dry cloth or paper towel; always dampen the glass surfaces prior to cleaning.
3. All moving parts of the sight are permanently lubricated. Do not try to lubricate them.

